If you need to create a high volume of art print products to sell in your store or are looking for a quick way to apply your preferred settings to future prints you want to sell, then our Presets feature is the solution for you!
What does the Presets feature do?
Presets is a time saving feature which replicates the product configuration of one product to another.
Simply save your preferences to a single file, then apply the same combination of settings to other print files in the click of a button. This includes:
- Paper choice
- Price
- Print sizes
- Framing
- Edition settings
- Digital signature placement
- Certificates of authenticity
- Letter to buyer
How to create a Preset
Step 1
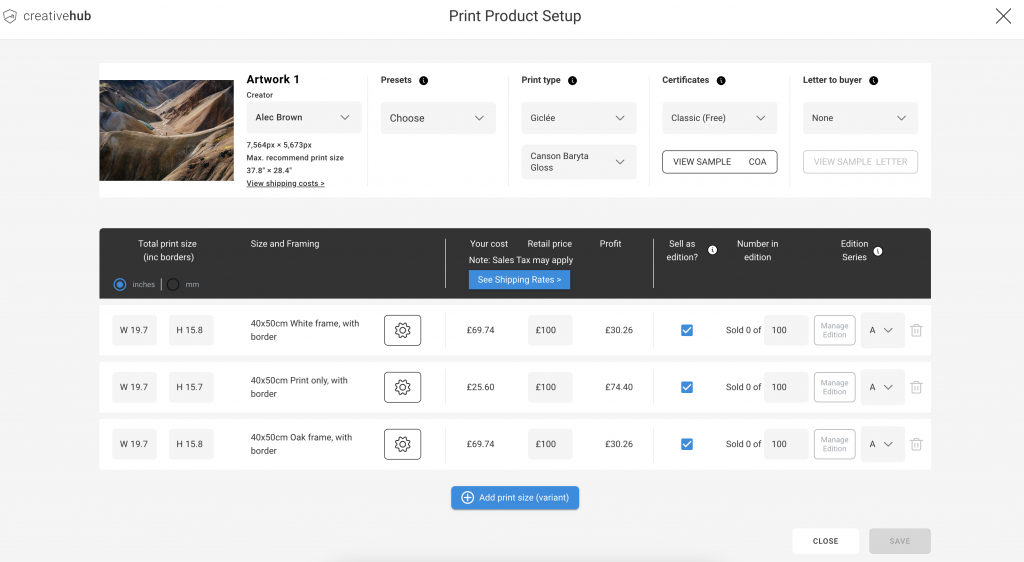
In order to make a Preset, you first need to setup your print file with the print settings you want to save as a preset. For more help on setting up print variants read this article.
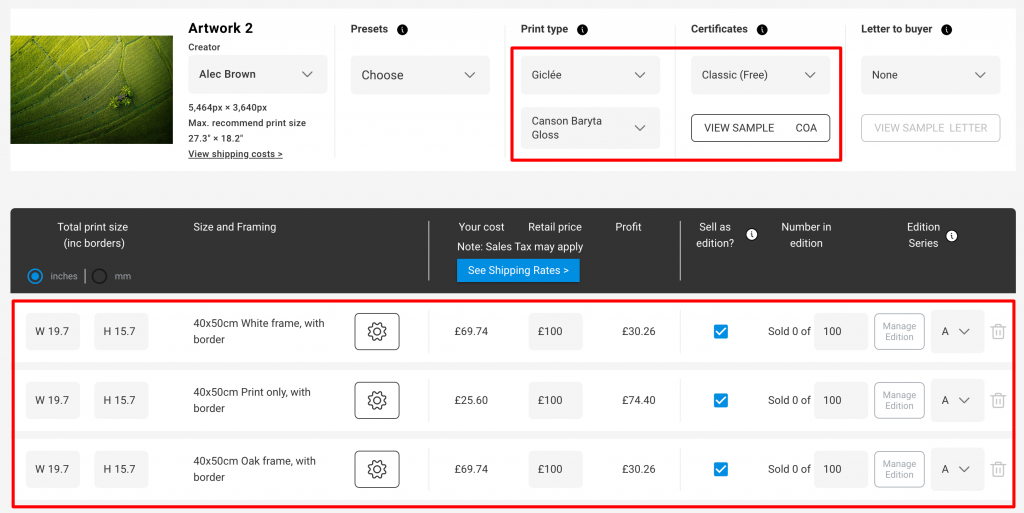
In the below screenshot you can see my product is setup on the Canson Bayta paper in three 40x50cm variants; one print only and two framed options. I have also applied edition settings and the free certificate of authenticity. These are the settings I want to save as a preset to easily apply to future files.
Step 2
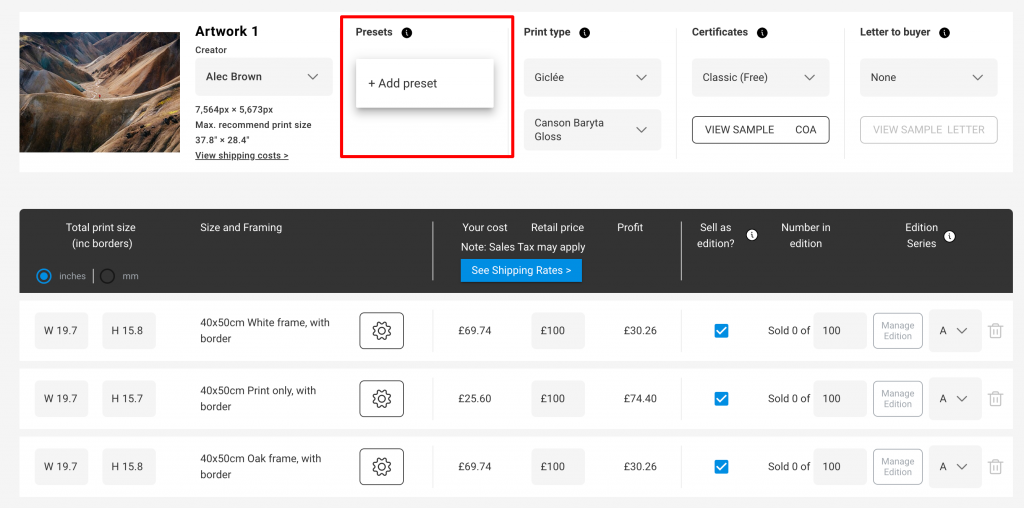
Once you have your preferred settings applied to the file, select ‘add preset’ from the Presets menu:
Give your Preset a name and click Save. Tip: name the Preset something simple for quick reference:
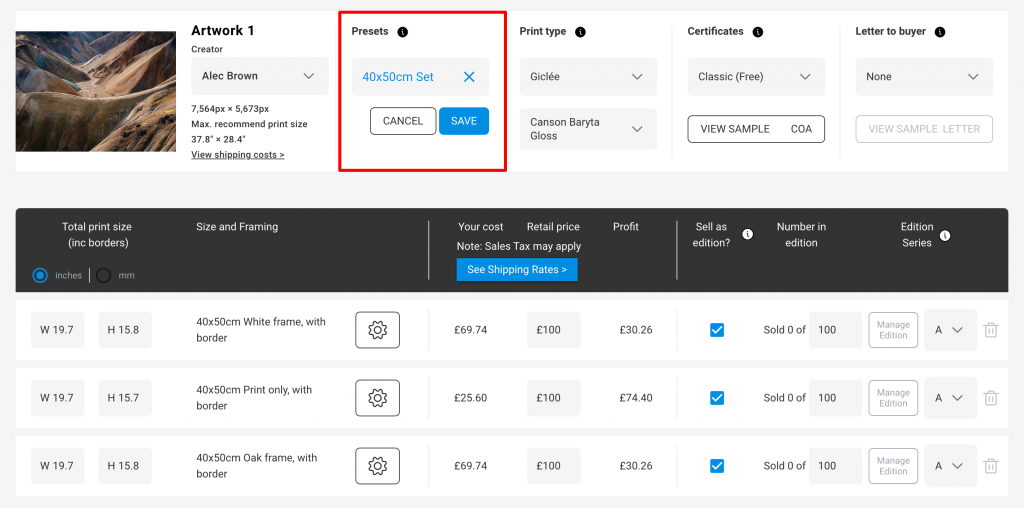
As simple as that, your Preset is saved!
How to apply a Preset
Step 1
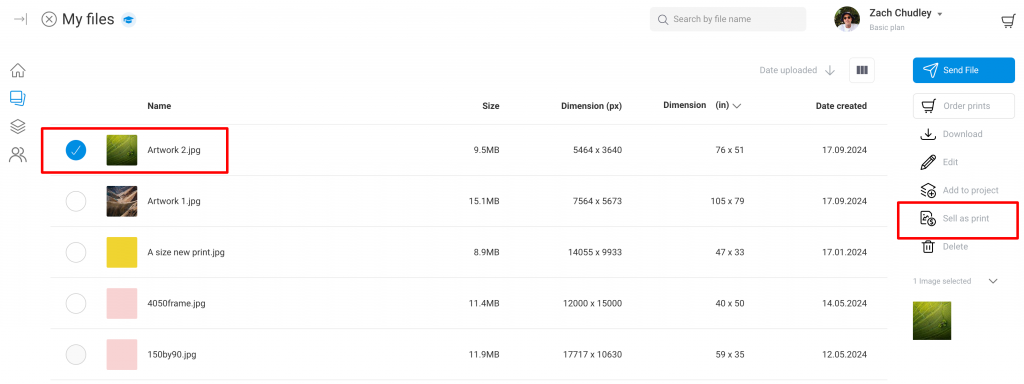
Locate the file you want to apply the preset to and click ‘Sell as print’. Tip: you can select multiple files
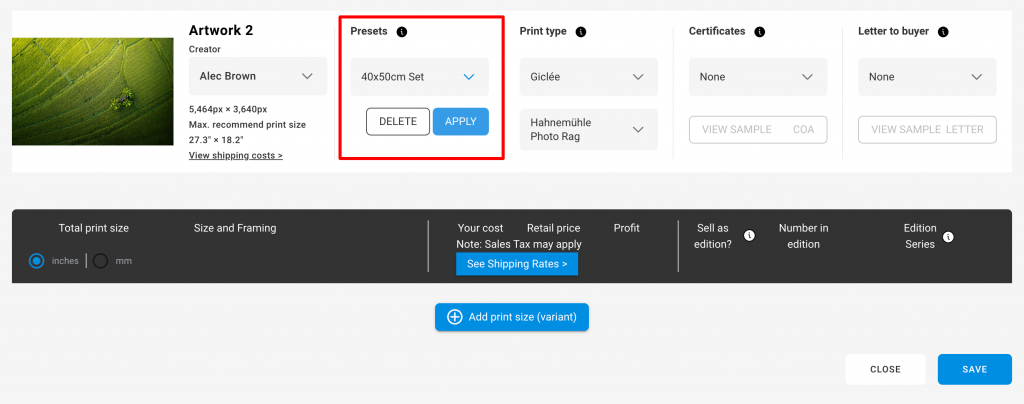
From the Preset menu, select your Preset and click Apply:
Once applied, you’ll see the Preset settings saved to your file:
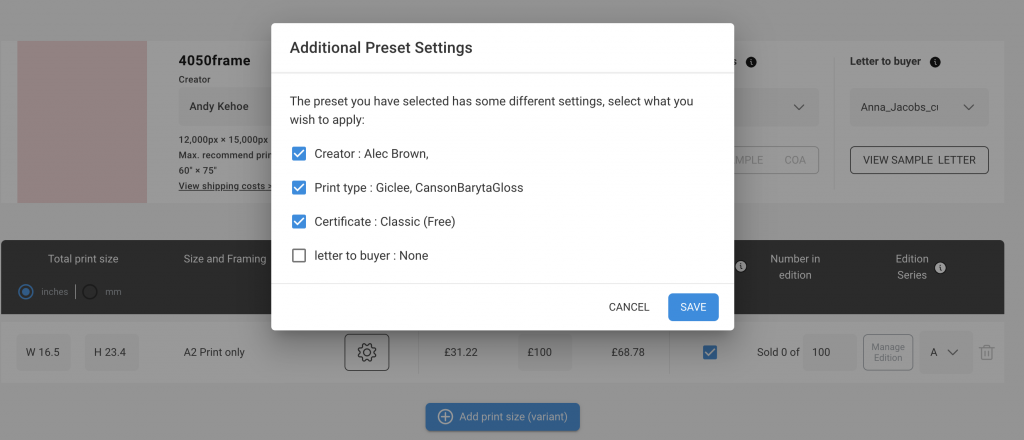
Note that if the file you are attempting to apply the Preset to already has some variants saved, and those product level settings differ from your Preset, you’ll be asked which of those settings you wish to copy over from the Preset. Simply tick the ones that you want to apply:
How to delete a Preset
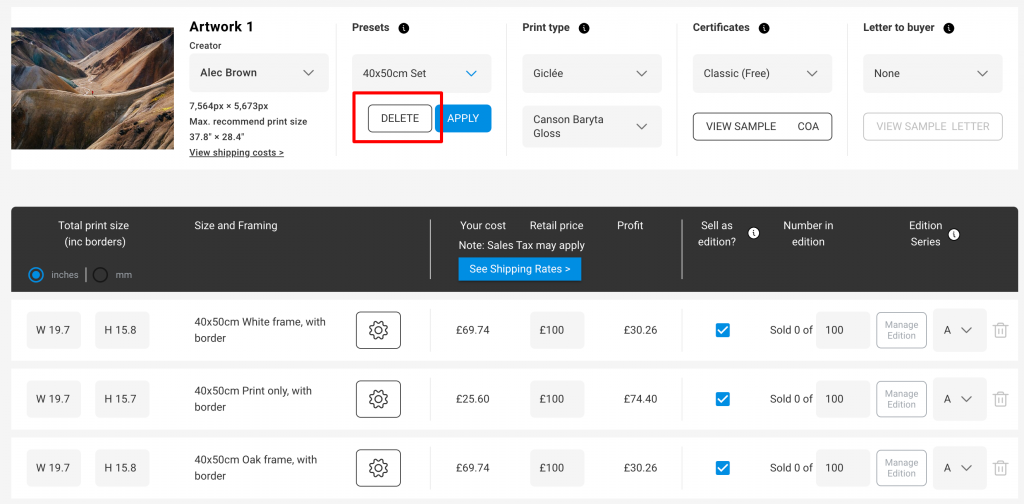
To delete a preset, open any file in the ‘sell as print’ view. Click the Preset menu, select the preset you want to delete and click Delete. Note this only deletes the Preset and not any products created with the Preset:
Noteworthy Preset rules and logic
- Deleting a Preset will only delete the Preset – it will not delete or change the products/variants that were generated using that Preset. They will all remain as they were.
- If your signature/edition number ‘font size’ is not the same numerical pixel value do not worry. All this means is that your print files have different pixel dimensions. You will see that visually the signatures look the same.
- Multiple Presets can be used to generate multiple variants for the same product.
- There is no limit to the number of files that Presets can be applied to.
- Once deleted, a Preset cannot be restored. It’s an irreversible change and it will have to be created again if deleted by accident.
- If a preset is applied to a product with a different “Creator”, the preset will change the creator too (if the user checks the box in the pop-up message) and the signature in the variants that existed before the preset was applied will also be replaced by the signature of the new creator according to the Preset.
- There is no limit to the number of Presets that a user can create.

